 Muffulettas
Serves 8
This is the Italian version of a Po’Boy, a round loaf layered with deli meats, cheese, and a flavorful tapenade perfumed with garlic, oregano, and roasted peppers. Switch up the deli meats for you favorites, however avoid meats that are strongly flavored and slightly tougher like prosciutto or pancetta. The sandwich is then cut into wedges the same way you would a pie, perfect for a picnic or even the centerpiece of your buffet table the next time you entertain. No matter what the occasion, I promise there’ll be smiles all around when you bring this to the table.
1/4 cup red wine vinegar
2 garlic cloves, peeled and minced
1 teaspoon dried oregano
1/3 cup olive oil
1/3 large pitted green olives, chopped
1/3 cup pitted, chopped kalamata olives
1/4 cup chopped roasted red bell peppers
Salt and freshly ground black pepper
1 round bread loaf (about 7 inches in diameter and 3 inches high)
4 ounces thinly sliced ham
4 ounces thinly sliced turkey breast
4 ounces thinly sliced chicken breast
4 ounces thinly sliced mortadella
4 ounces thinly sliced salami
4 ounces sliced provolone
1/2 red onion, thinly sliced
1 1/2 ounces arugula leaves
Whisk the first 3 ingredients in a large bowl to blend. Gradually whisk in the oil, allowing the mixture to emulsify. Stir in the olives and roasted peppers. Season the vinaigrette, to taste, with salt and pepper.
Cut the top 1-inch of the bread loaf. Set the top aside. Hollow out the bottom and top halves of the bread. Spread some of the olive and roasted pepper mix over the bread bottom and cut side of the bread top. Layer the meats and cheeses in the bread bottom. Top with the onions, then the arugula. Spread the remaining olive and roasted pepper mix on top of the sandwich and carefully cover with the bread top. Wrap the entire sandwich tightly in plastic wrap and place in the refrigerator for 24 hours before serving to allow the flavours to develop and to make the loaf easier to slice.
Cut the sandwich into wedges and serve.
Saturday, December 22, 2007
Muffulettas
Friday, December 21, 2007
Panettone
 Panettone
Makes 2 loaves
Panettone is a rich Italian holiday bread usually served at Christmas. Typically studded with raisins, candied fruit, candied citrus peel, or chocolate chips and liqueurs, but don’t let that stop you from being creative. Panettone can be stored tightly wrapped in plastic wrap for a week or frozen for up to a month. This not to sweet bread can be served at breakfast, with a cup of coffee or tea, or after your Christmas feast. Try toasting a slice and topping with some jam for a rich and delicious breakfast. Panettone slices can also be used to make French toast which are equally delicious.
2 packages active dry yeast
4 cups all-purpose flour
1/2 cup warm milk, 100 degrees to 110 degrees
2/3 cup sugar
4 large eggs
3 large egg yolks
1 teaspoon vanilla extract
3/4 cup unsalted butter, cut into pieces and chilled, plus extra melted for greasing
1 1/4 teaspoon salt
2 cups mixed dried and candied fruit
Zest of 1 lemon
Zest of 1 orange
1 large egg white
1. To make the sponge, warm a small bowl by rinsing it with hot water. Pour in warm water, and sprinkle 1 package yeast on it. Stir with a fork until yeast has dissolved and let stand until foamy about 5 to 10 minutes. Stir in 1/2 cup flour, cover with plastic wrap, and let stand in a warm place until doubled, about 30 minutes.
2. Sprinkle remaining package yeast over warm milk. Stir with a fork until yeast has dissolved and let stand until foamy about 5 to 10 minutes.
3. Beat together sugar, eggs, egg yolks, and vanilla. Wisk into yeast-milk mixture.
4. In the bowl of an electric mixer fitted with the paddle attachment, combine butter, salt, and remaining 3 1/2 cups flour until crumbly. Slowly pour in egg mixture, and beat on low speed until combined. Add in sponge mixture and switch to dough hook. Beat on medium speed for about 9 minutes, until dough is elastic-looking and long strands form. Beat in fruit and zests. Turn dough into a buttered bowl, cover with lightly buttered plastic wrap, and leave in a warm place to rise until doubled, 2 to 3 hours.
5. Generously butter two panettone molds and set on a rimmed baking sheet.
6. Turn out dough onto a lightly floured board and knead a few times to deflate. Divide dough in half. Knead each half into a ball, and drop into prepared molds and cover loosely with buttered plastic wrap. Leave in a warm place to rise until dough has risen just slightly above the top of the molds.
7. Heat oven to 400º F. Carefully cut an X in the top of each loaf with oiled scissors. In a small bowl, whisk the egg white and brush top of each loaf. Place baking sheet in bottom third of oven. After 15 minutes, lower heat to 350º F. Bake for 40 more minutes or until an instant read thermometer read 190º F when inserted into the center of the loaf; if tops get too brown while baking, cover with foil. Cool on a wire rack 15 to 20 minutes before un-molding.
Wednesday, December 19, 2007
Spiced Wreath Cookies
 Spiced Wreath Cookies
Makes about 8 dozen
Spritz cookies get their name from spritzgebäck, a traditional German cookie made during Christmas time for basic ingredients (flour butter, sugar, and eggs). These cookies are somewhat fragile, delicate, dry and buttery. This twist on the traditional recipe add an immoderate amount of vanilla, with the addition of cinnamon and nutmeg, spices familiar to the holiday season. This dough is quite soft so you will have no trouble putting it through your cookie press. The dough will adhere best to ungreased non-stick cookies sheets that are slightly chilled. It’s important not to chill you cookie dough and that all your ingredients are at room temperature or you run the risk of breaking your cookie press with a dough that is too stiff. We used a wreath disk but you can make any shape you like, these make great cookies for the kids to decorate with tinted royal icing, just omit the cinnamon sugar.
1 teaspoons salt
1 teaspoon ground cinnamon
1/2 teaspoon ground nutmeg
2 teaspoons vanilla
1 cup granulated sugar
1 1/2 cups unsalted butter, room temperature
2 large egg yolk, plus 2 large eggs lightly beaten together
2 teaspoons ground cinnamon mixed with 4 teaspoons sugar
1. Preheat oven to 350 ºF. Whisk together flour, salt, cinnamon, and nutmeg.
2. In the bowl on an electric mixer fitted with the paddle attachment beat the sugar and butter until pale and fluffy, about 3 minutes. Add in eggs and vanilla and beat until fully incorporated, scraping down the sides of the bowl with a spatula after each addition. Add flour mixture, and beat until just combined.
3. Attach a wreath disk to a cookie press. Divide dough into four portions. Fill press with dough. Press cookies onto baking sheet according to cookie press’ instructions spacing them 2 inches apart.
3. Bake until barely golden, 9 to 12 minutes. Immediately sprinkle cookies with cinnamon sugar. Let cool slightly, then transfer to wire racks to cool completely. Repeat with remaining dough. Cookies can be stored at room temperature for up to a week or frozen for up to a month.
Tuesday, December 18, 2007
Swedish Meatballs
 Swedish Meatballs
Makes about 4 dozen; serves 8
This recipe was adapted from the traditional Swedish Meatballs served family style to create these wonderfully moist and flavorful cocktail meatballs. This recipe can be prepared in advance up to the end of step one. Once the meatballs are in the freezer, allow them to freeze completely in a single layer, once frozen transfer them to a re-sealable freezer bag. The meatballs can be kept in the freezer for up to two months. They’re so easy and delicious you may want to make a double batch so you’ll always have some on hand for those last minute get-togethers. Just make sure you let the meatballs thaw slightly before proceeding.
10 ounces each ground sirloin and ground pork
1 (about 1/2 cup) small onion, finely chopped
1/2 cup sour cream
1 large egg, lightly beaten
3 tablespoons fine dry breadcrumbs
1 1/2 teaspoons coarse salt
Freshly ground pepper
1/2 teaspoon ground allspice
1/4 teaspoon ground nutmeg
1 tablespoon vegetable oil
2 tablespoons dry red wine
2 tablespoons all-purpose flour
2 cups homemade or low-sodium store-bought beef stock
1/4 cup coarsely chopped fresh flat-leaf parsley
1. Preheat oven to 275 degrees. Combine beef, pork, onion, sour cream, egg, breadcrumbs, salt, pepper, and spices with hands. Shape into 1-inch balls. Freeze on a rimmed baking sheet 30 minutes. Reroll in hands.
2. Heat oil in a 12-inch nonstick skillet over medium-high heat. Working in batches so as not to over crowd the pan, cook meatballs, shaking skillet, until browned and cooked through, about 6 minutes. Keep warm in oven on a clean rimmed baking sheet.
3. Pour off fat and large brown bits from skillet. Add wine; cook over medium heat, stirring, until mostly reduced. Whisk in flour; add stock. Raise heat to medium-high. Simmer, stirring, until thick, 8 to 10 minutes. Pour through a sieve. Top meatballs with sauce and parsley.
Monday, December 10, 2007
Carving a Roast Chicken
Here's how to cut up a roast chicken so that each serving includes white meat and dark meat.
 1. Place chicken, breast side up, on cutting board. With a chef's knife, cut through skin between breast and thigh. Using a fork, gently push leg away to expose joint. With tip of knife, cut through joint to free the whole leg.
 2. Wriggle drumstick to find where it meets thigh, or try to locate with tip of knife. Cut through joint with a firm, downward motion.
 3. Using tip of knife, cut along breast bone and wishbone, separating meat from bone. While gently pushing breast back, nip and cut with tip of knife, following contour of rib cage, cutting meat off bone.
 4. To serve, cut breast in half on the diagonal so there's enough breast meat to go around.
Published in Everday Food Mag May 2006
Basic Roast Chicken
Basic Roast Chicken
Serves 4
 A good roast chicken recipe is definitely worth it weight in gold and this one is just that. Perfect for a Sunday night family dinner and elegant enough to entertain with, this recipe is as easy as it is versatile. A meat thermometer is essential and will ensure a perfectly cooked bird and eliminate the guest work, so if you don’t have one I would strongly recommend you purchase one. They are quite common and can be found in most super markets for only a few dollars. If you don’t have a roasting pan a Dutch Oven also works great for roasting. The roasting process is quite simple and involves little effort, if any at all. Roasting a whole chicken on the bones will give you a moist and flavorful bird. Carving a whole bird might seem intimidating at first but after a basic understanding of how to cut up the chicken, you’ll be doing it without breaking a sweat! See instructions here.
2 tablespoons unsalted butter
Salt and freshly ground black pepper
2 medium onions, peeled and sliced crosswise 1/2 inch thick
1 lemon
5 large cloves garlic, peeled
2 sprigs fresh thyme
1 sprig fresh rosemary
1 sprig fresh parsley
1 cup chicken stock, store bought or homemade (low sodium)
Roasted Fall Vegetables
 Roasted Fall Vegetables
Serves 6-8
This recipe is great during the fall after that last harvest. The brown sugar glazes and caramelizes the vegetables giving them a sweet crunch that even the kids will enjoy! The root vegetables don’t need to be peeled, just give them a good scrub, the peel is where most of the nutrients are. These are a perfect companion to a roast chicken or a holiday roast. Feel free to swap out vegetables for your personal favorites or try the ones listed in this recipe, I promise this recipe will make you fall in love with vegetables all over again.
1/3 cup extra-virgin olive oil
3 medium carrots (about 3/4 pound), cut into 2-inch long pieces
1 1/2 cups Brussels sprouts (about 1/2 pound), halved
2 large potatoes (about 1 pound), cut into 2-inch long pieces
3 medium parsnips (about1 pound), cut into 2-inch long pieces
1 medium acorn squash (about 1 pound), cut into 1/2-inch thick wedges
1 tablespoon dried oregano
1 tablespoon fresh rosemary, finely chopped
1 teaspoon fresh thyme, finely chopped
1 teaspoon freshly ground black pepper
2 tablespoons brown sugar
Preheat oven to 400 degrees F.
Grease an 11 by 17-inch baking sheet pan with extra-virgin olive oil. Place vegetables in baking sheet and add the fresh herbs, brown sugar and pepper. Toss well, evenly coating all the vegetables with the seasonings and oil. Add more oil if the vegetables seem dry
Spread the vegetables evenly on a large baking sheet. Place on middle rack in oven and bake for 35 to 40 minutes.
Monday, November 26, 2007
Hummus
 Hummus
This hummus recipe is delicious and quick to prepare. adjust ingredients to taste, if you prefer more garlic add another, or perhaps a little more chili powder. This recipe is the perfect canvas for you to create something unique. Tahini is a paste made from roasted sesame seeds which can be found in specialty stores and most super markets.
Makes 5 servings
1 can (15 ounces) chickpeas
2 tablespoons fresh lemon juice
1/2 cup tahini (sesame paste)
1/4 cup chopped yellow onion
3 cloves garlic, chopped
2 teaspoons extra-virgin olive oil
2 teaspoons ground cumin
1/4 teaspoon chili powder
1/2 teaspoon salt
Drain the chickpeas, reserving 1/4-1/2 cup of the liquid.
Combine the chickpeas, lemon juice, tahini, onion, garlic, oil, cumin, pepper, and salt in a blender or food processor. Puree until smooth, adding the chickpea liquid or warm water as needed to thin the puree.
Refrigerate for 3 to 4 hours before serving to blend the flavors.
Serve.
Saturday, November 24, 2007
Pretty Petits Fours
 Pretty Petits Fours
Makes 35 Petits Fours
A Petit Four is basically a bit size dessert, they can be cakes, pastries, or even candies. These were made with Mexican Vanilla which has a slightly sweeter more intense flavor. These make great party favors packaged in individual boxes so you're guest can take them home. You can decorate them however you like, we used little pink flowers and pearls which seemed rather appropriate for the baby shower they catered to. When applying the buttercream, only put a paper thin coating to allow the fondant to adhere, if you prefer more icing on your cakes it would be wise to double the recipe for the buttercream.
1 White Cake
1 recipe Italian Meringue Buttercream
2.5 pounds rolled fondant (available at cake decorating supply stores)
1 recipe Royal Icing
Cornstarch for work surface for rolling out fondant
Tools and Materials
Serrated knife: To slice uneven cake layers with precision.
Offset spatula: Its flat, slightly flexible metal blade makes this the best tool for spreading icing.
Piping bag: A soft, conical sack with the tip lopped off, made of coated fabric or plastic. Put each color of icing in its own bag, so you don't have to wash bags in the middle of the project.
Piping tips: A round hole creates a line or dot; a star-shape hole makes a ridged line or flower.
Plastic coupler: Allows you to change piping tips to make various shapes in the same color.
Drinking glass: Place a damp paper towel at bottom, and set piping bags in it when not in use.
Cake turntable: Lets you spin the cake with one hand while holding bag or spatula steady with the other (a useful extra).
Pretty Petits Fours How-To
All these designs were piped with a #4 plain tip using royal icing, which dries hard in about ten minutes.
Place sheet cake on clean work surface, top side up. Trim top to make level. Cut cake in half into to equal rectangles of 13 x 9 inches. Sandwich layer of buttercream between the layers. Trim sides of cake to be square. Cut cake into 35 1-1/2-inch squares. Place each on its own piece of parchment or waxed paper. Ice each with a thin layer of buttercream to help fondant stick to cake. Chill blocks to set the buttercream.
Lightly brush cornstarch onto a clean work surface. You'll cover just one block at a time. Remove a 2-inch ball of fondant (tightly wrap remaining fondant to keep it from hardening). Using a rolling pin, roll it out into a thin circle about 1/8 inch thick and roughly 7 inches in diameter. Don't refrigerate the blocks after you cover them; the fondant will get sticky.
Remove cake squares from refrigerator. Center the rolled fondant circle over a block of cake, and place it gently on the cake. Carefully press the fondant against the sides of the block, working on two opposite sides at the same time and smoothing up from the bottom. Repeat for the other pair of sides. Gently pinch the fondant together at the corners, creating four flaps. Working quickly, so fondant doesn't dry out, fold two flaps toward center of one side, as if wrapping a gift box; repeat for opposite side. Use a dab of water to help the flaps adhere, if necessary. Trim excess fondant from base of block with a sharp knife.
Repeat process for each block, using different-colored fondants, as desired. (If trimmed scraps are free of crumbs, knead together and reuse.)
Ice cakes with royal icing along the top and bottom borders. Top with flowers or other decoration made from fondant, use royal icing to adhere.
White Cake
White Cake
Makes 1 13-by-18-inch cake
Cake can be made ahead and stored up to one day in refrigerator or up to one week in the freezer.
1 1/4 cups (2 1/2 sticks) unsalted butter, softened, plus more for pan and wire rack
4 1/2 cups sifted cake flour, plus more for pan
2 tablespoons baking powder
3/4 teaspoon salt
1 1/2 cups milk
2 tablespoons pure vanilla extract
2 1/4 cups sugar
7 large egg whites
Preheat oven to 350 degrees. Butter baking pan. Line bottom with parchment paper; butter paper, and dust with flour, tapping out any excess. Set aside.
Sift together flour, baking powder, and salt into a medium bowl, and set aside. Combine milk and vanilla in another bowl, and set aside. Beat butter in the bowl of an electric mixture fitted with the paddle attachment until pale and creamy. Add sugar in a steady stream, and continue beating until light and fluffy, about 3 minutes. Reduce speed to low. Add dry ingredients in three batches, alternating with the milk mixture and starting and ending with the dry ingredients. Be careful to avoid overbeating. Set aside.
In a clean bowl of an electric mixer fitted with the whisk attachment, beat egg whites until stiff peaks form. Fold a third of the whites into batter until combined. Fold in remaining whites in two batches.
Pour batter into prepared pan, and smooth top with a metal spatula. Bake until a tester inserted near the center comes out clean and the cake springs back when pressed lightly in the center, 35 minutes. Transfer to wire rack; cool 15 minutes before unmolding. Butter wire rack. Loosen cake sides with a paring knife, and invert cake onto greased rack. Reinvert to prevent it from splitting. Cool completely before using or storing in the freezer.
Italian Meringue Buttercream
Italian Meringue Buttercream
Makes 4 1/2 cups
Use this to frost the Pretty Petits Fours, or your favorite layer cake. Its important that your egg and syrup mixture come to room temperature before adding the butter otherwise your egg whites will deflate. Make sure your butter is very soft, I leave mine out over night.
1 1/4 cups sugar
5 large egg whites
Pinch of cream of tartar
1 pound (4 sticks) unsalted butter, room temperature
1 teaspoon pure vanilla extract
In a small saucepan over medium heat, bring sugar and 2/3 cup water to a boil. Continue boiling until syrup reaches 238 degrees.on a candy thermometer (soft-ball stage).
Meanwhile, place egg whites in the bowl of a standing mixer fitted with the whisk attachment, and beat on low speed until foamy. Add cream of tartar, and beat on medium-high speed until stiff but not dry; do not overbeat.
With mixer running, add syrup to whites in a stream, beating on high speed until no longer steaming, about 5-10 minutes. Add butter bit by bit, beating until spreadable, 3 to 5 minutes; beat in vanilla. If icing curdles, keep beating until smooth.
Royal Icing
Royal Icing
Makes about 1 1/4 cups
You can substitute 5 tablespoons meringue powder and 1/3 cup water for 2 raw eggs. This icing is great for doing detail work on cakes, decorating cookies, or building gingerbread houses. The icing dries hard in about 15 minutes.
1 large egg whites, or more to thin icing
2 cups sifted confectioners' sugar, or more to thicken icing
1/2 lemon, juiced
Beat the whites until stiff but not dry. Add sugar and lemon juice; beat for 1 minute more. If icing is too thick, add more egg whites; if it is too thin, add more sugar. The icing may be stored in an airtight container in the refrigerator for up to 3 days.
Wednesday, November 21, 2007
Almond Ginger Biscotti
 Almond Ginger Biscotti
Makes 3 dozen
Ginger might seem somewhat foreign, even though it makes its way into many dishes these days. This recipe calls for crystallized or candied ginger which can be found in health stores and most grocery stores. The ginger adds a hint of citrus with a little bit of kick to it, if you’re not a fan you can just leave it out. The lack of butter in these cookies creates a very firm cookie that can be stored for a longer period of time. Cookies should be cut to a 1/4 of an inch in thickness to make it easier to bite into them; they’re also great for dunking in a cup of tea!
2 cups all-purpose flour, spooned and leveled, plus more for dusting
3/4 cup sugar, plus 1 teaspoon for dusting
2 teaspoons baking powder
2 tablespoons grated (about 2 lemons) lemon zest
1/4 teaspoon salt
1 1/2 cups unblanched, whole almonds
1/4 cup chopped crystallized ginger
3 large eggs
2 teaspoons vanilla extract
Preheat oven to 350 degrees. In a large mixing bowl, whisk together flour, 3/4 cup sugar, baking powder, zest, and salt. Stir in almonds and ginger.
In a small bowl, whisk together eggs and vanilla; stir into flour mixture. (Dough will appear very dry but will come together when kneaded.)
Transfer dough to a lightly floured work surface; knead until smooth. Divide dough in half; shape into two logs, each about 1 inch high and 3 inches wide. Place on a parchment lined baking sheet; sprinkle with remaining sugar.
Bake until logs are puffed and outside is firm (the tops may crack), about 30 minutes. Transfer to a wire rack to cool completely, about 2 hours.
Using a serrated knife, thinly slice the logs crosswise,1/4 inch thick. Lay slices on two parchment-lined baking sheets. Bake until crisp and lightly golden, rotating pans and turning biscotti over halfway through, 20 minutes total. Cool completely before serving or storing.
Sunday, November 18, 2007
Linzer Hearts
 Linzer Hearts
Makes about 1 dozen sandwich cookies
Hazelnuts impart an unmistakable flavor to these cookies, but feel free to substitute the same amount of ground almond, pecans, or walnuts. However linzer cookies are traditionally made with hazelnuts and some form of raspberry filling. These cookies are quite delicate, therefore handle gently. These are also one of the few cookies that can’t be store very longer, or frozen at all, but they’re so delicious I doubt that will be a problem!
2 cups all purpose flour, plus more for dusting
1teaspoon baking powder
1/2 teaspoon ground cinnamon
1/4 teaspoon salt
1 cup (4 1/2 ounces) blanched hazelnuts
1 cup (2 sticks) unsalted butter, room temperature
2/3 cup granulated sugar
2 large egg yolks
1/2 teaspoon pure vanilla extract
1/2 teaspoon freshly grated lemon zest
1/2 cup raspberry jam, for filling
1/4 cup confectioners’ sugar, for dusting
In a large bowl, sift together flour, baking powder, cinnamon, and salt. In a food processor, pulse hazelnuts until finely ground. Whisk the ground hazelnuts into the flour mixture; set aside.
In the bowl of an electric mixer fitted with the paddle attachment, beat butter and granulated sugar on medium-high speed until light and fluffy, 2 to 3 minutes. Add the egg yolks, vanilla, and lemon zest; beat to combine, scraping down the sides of the bowl as needed. With mixer on low speed, add hazelnut-flour mixture, and beat until just combined, 10 to 15 seconds.
Turn out the dough onto a lightly floured work surface, divide in half, and shape into flattened disks. Wrap in plastic and refrigerate at least 1 hour or overnight.
Remove one disk of dough from the refrigerator, and let stand until softened slightly. (This will help keep the dough from cracking when rolled.) On a large piece of parchment paper lightly dusted with flour, roll dough to 1/8-inch thickness. To prevent sticking while rolling occasionally run a large offset spatula under dough, and add more flour to the top or bottom of dough. Transfer parchment paper and dough to a baking sheet; freeze until firm, about 20 minutes. Repeat with remaining. (You can stack the parchment and dough.)
Preheat the oven to 325∞F. Line two large baking sheets with parchment paper. Remove one sheet of dough from the freezer; working quickly, cut into heart shapes using a 3-inch heart shaped cookie cutter. Cut out the center from half the shapes using a 2-inch heart shaped cookie cutter. (If dough begins to soften too much, return to the freezer for a few minutes.) Using a wide metal spatula, transfer open hearts to prepared baking sheets, about 1 1/2 inches apart; freeze for 15 minutes or until firm. (You can either bake the cutout centers for bite size cookies or reroll them to make larger hearts.)
Bake, rotating sheets halfway through, until cookies are crisp and lightly golden all over, about 15 minutes. Transfer cookies to a wire rack to cool completely. (Cooled cookies can be stored overnight in an airtight container at room temperature before filling.) Spread the flat sides of the whole hearts with about 1 1/2 teaspoons jam. Sift confectioners’ sugar over open hearts and use to top jam spread cookies. Cookies should be eaten the day they’re filled.
Saturday, November 17, 2007
Pepper & Espresso Biscotti
 Pepper & Espresso Biscotti
Yield: 22
These biscotti are slightly tenderer than the usual biscotti thanks to the addition of butter. Not to worry they’re just as delicious and dunkable! Nuts would also be great in these biscotti, just be sure to use a softer nut; pine nuts or walnuts would be great!
Biscotti:
1/2 cup unsalted butter, room temperature
3/4 cup sugar
1/4 cup dark brown sugar
2 eggs
1 tablespoon instant coffee powder
1 tablespoon ground espresso beans
1 tablespoon vanilla extract
2 2/3 cups all purpose flour
1 1/2 teaspoons baking powder
1 teaspoon ground black pepper
1/2 teaspoon cinnamon
1/2 teaspoon salt
Dusting:
1/4 cup coco powder
1 teaspoon ground espresso beans
1/2 teaspoon ground black pepper
Preheat oven to 350° F. Beat butter with sugars until pale and fluffy. Add eggs and blend well. Stir ground espresso beans, instant coffee powder into vanilla to dissolve (heat for a moment in microwave, if necessary). In a separate bowl, combine flour, baking powder, black pepper, cinnamon and salt. Add to butter mixture and mix until blended.
Shape cookie dough into 2 logs and place on a parchment-lined baking tray leaving 3 inches between them. Combine coco powder, espresso beans, and black pepper in a small bowl, roll logs in coco mixture. Press lightly with palm of hand to flatten slightly.
Bake for 35 to 40 minutes, until tops are rich golden color.
Reduce oven temperature to 325° F. While still warm, slice 1/2-inch biscotti on the bias of the loaves and place back on the baking sheet. Bake for 12 to 15 minutes until lightly browned around the edges. Biscotti will firm up further as they cool. Store in airtight container for up to a week, or freeze for up to a month.
Salmon Mousse in Tortilla Cups
 Salmon Mousse in Tortilla Cups
This is a great little hors d’oeuvre that can be whipped up in no time at all. Use whatever ingredients you have on hand, substitute the herb of your choice, and the poached salmon can be replaced smoked salmon which would also be delicious. If you’re not familiar with poaching it basically just means to cook in a flavorful liquid. Fill a sauce pan 2/3 of the way full with water add a few sprigs of cilantro (no need to remove the roots), whole peppercorns, coarse salt, green onion cut in half lengthwise, and a dash on vinegar. Bring to a simmer and skim off any foam. Submerge the salmon into the liquid and simmer until cooked throughout. As for the rest of this recipe it an whipped together in a matter of minutes, feel free to get creative and swap ingredients to create something new!
For the mousse:
1/2 cup of cream cheese
500 g of poached salmon
1 tbsp of chopped, fresh cilantro
Juice of 1-2 limes
Fresh ground pepper
Fresh cilantro or parsley pieces for garnishing
For the Tortilla Cups:
6 flour tortillas
3 tablespoons chili oil
For the Mousse:
Put ingredients into a food processor and puree until smooth. Set aside.
For the Tortilla Cups:
Preheat oven to 350 degrees.
Brush tortillas with chili oil and cut into 3-inch circles with a biscuit cutter. Press into a mini muffin cups and bake until crispy, about 15 minutes. Set on a rack to cool.
Fill a plastic freezer bag with the salmon mousse and squeeze it toward one of the corners. Cut the tip off with a pair of scissors to form a piping bag. Pipe the mousse into the tortilla cups and top with a sprig of cilantro or parsley.
Balsamic-Glazed Brussels Sprouts with Pancetta
Balsamic-Glazed Brussels Sprouts with Pancetta
Serves 4. One of the great things about cooking with balsamic vinegar is the wonderfully sweet flavor it develops as it reduces. Pancetta for those of you wondering is an Italian cured ham; if you can’t find it you can substitute bacon, which will give a very similar flavor. One thing I can grantee, between the salty bite from the pancetta and sweet tang from the vinegar-glaze, this dish will surely change your opinion of brussels sprouts.
1 pound brussels sprouts
Salt and freshly ground black pepper
2 tablespoon unsalted butter
1 tablespoon olive oil
1/4 cup French shallot, finely diced
1/4 cup balsamic vinegar
3 ounces paper thin slices of pancetta, coarsely chopped
Trim outer leaves and stems from brussels sprouts, and discard. Bring a medium pot of water to a boil, and add salt. Meanwhile, prepare an ice-water bath. Add brussels sprouts to boiling water, and cook until tender but still bright green, about 4 minutes. Remove from heat, drain, and plunge into ice-water bath to cool. Drain well, and cut in half.
Heat 1 tablespoon butter and 1/2 tablespoon olive oil in a large heavy skillet over medium-high heat. Add brussels sprouts, and cook, tossing occasionally, until they are brown and crisp on the edges, about 3 minutes. Season to taste with salt and pepper, and transfer to a large bowl. Cover with aluminum foil to keep warm.
Add remaining 1/2 tablespoon each butter and oil to the same pan over medium-low heat. Add shallot, pancetta, and cook, tossing occasionally, until shallots are tender and transparent, about 3 to 4 minutes. Add vinegar (stand back to avoid the fumes), and stir to loosen any brown bits on bottom of pan. Cook until vinegar is reduced and the onions are glazed, about 30 seconds.
Add onions to brussels sprouts, and toss well. Serve immediately.
Bouillabaisse
 Bouillabaisse
Makes 8 to 10 portions
Bouillabaisse in a classic seafood soup, traditionally serve with Croûtes & Rouille. The key to this delicious dish is all the fresh seafood, if you can’t find the fish listed here feel free to substitute your favorite fish or shellfish, just remember that the fish should be firm white fish which have more delicate flavors and will hold up better during cooking. If you’ve never cleaned fish before it might be a wise decision to ask you fish monger to do it for you or show you how. As for the mussels, a great way to get out any sand that my be in them-which you don’t want in your soup-is to place a handful of flour into a bowl of room temperature water and allow the mussels to soak for a few minutes. The mussels will drink in the water and flour mixture and release and sand that might be in them with the flour mixture back into the bowl. It is always a good idea to scrub the shells of your clams and mussels under running water with a firm bristled brush. Open shellfish should close up if you gently tap their shell; any that remain open need to be discarded.
1/2 cup good quality olive oil
1 1/2 cups leeks, well rinsed, coarsely chopped
1 cup yellow onions, finely chopped
2 cups canned concentrated tomato purée
3 cups chopped fresh tomatoes
2 tablespoons dried thyme
1/2 cup chopped flat-leaf parsley
2 bay leaves
2 cups white wine
4 cups fish stock
salt and fresh ground pepper, to taste
6 tablespoons unsalted butter, room temperature
2 teaspoons all purpose flour
1 1/2 teaspoons whole saffron
2 quarts fresh mussels, scrubbed and de-bearded
48 cherrystone clams, scrubbed
3 pounds skinless firm white fish steaks, like bass, snapper or cod, cut into cubes
36 raw shrimp, shelled and de-veined
4 lobster tails, fresh or defrosted, shelled and halved crosswise
Croûtes & Rouille
Heat the olive oil in a large soup pot over medium heat. Add the leeks and onions and cook, covered, until the vegetables are tender and lightly colored, about 25 minutes stirring occasionally.
Add the tomato purée, tomatoes, thyme, parsley, bay leaves, wine, fish stock, and salt and pepper. Simmer to blend the flavors, 20 minutes. (The soup can be prepared several hours ahead to this point. Return to a simmer before proceeding.)
Blend the flour and butter together in a bowl and whisk the mixture into the soup.
Add the saffron, mussels, and clams and simmer for 5 minutes. (Shells will begin to open.) Add the fish, shrimp, and lobster tails, cover and simmer until all the shellfish are opened, about another 5 minutes. Do not over cook. Remove any shellfish that has not opened and discard.
Ladle into hot soup plate, garnish with Croûtes & Rouille. Serve immediately.
Coûtes & Rouille
Coûtes & Rouille
Rouille is basically a strongly flavored mayonnaise, which compliments the rich flavors of Bouillabaisse perfectly. The recipe can also be made in a blender or small food processor, using the feed tube to add the oil in a slow steady stream.
1 egg yolk
2 to 3 cloves of garlic
1 small red hot pepper (or chili powder)
1 cup oil
1 tbsp tomato paste or pureed roasted red pepper (optional)
salt and pepper to taste
lemon juice to taste
1 baguette
Coûtes :
Slice baguette diagonally into 1/4 inch slices and arrange on a baking pan in a single layer. Bake at 425∞F until golden and crisp.
Rouille :
Whisk the yolk with the garlic and hot pepper. Slowly whisk in the oil, adding it drop by drop. Whisk in the tomato paste or puréed red pepper, if you want a rust-colored mayonnaise. Season with salt, pepper, and lemon. Spread on toasted baguette croûtes. Serve afloat on or alongside Bouillabaisse.
Friday, November 16, 2007
Rosemary & Garlic Focaccia

Rosemary & Garlic Focaccia
Makes 1 loaf
This dense Italian flat bread has wonderful aroma and flavor. There's nothing better that coming home to warm house filled with the sent of freshly baked bread. The garlic is only used to top the bread and when it bakes develops a delicious nutty flavor. The coarse cornmeal will give your bread a nice crust, and the coarse salt adds a little sparkle and lots of flavor. The process might seem a little time consuming but its definitely worth it!
8 tablespoons olive oil, plus more for bowl
Coarse cornmeal for sprinkling
2 1/2 cups warm milk (110∞F)
1 package active dry yeast
5 cups all-purpose flour
2 teaspoons coarse salt, plus more for sprinkling
3 tablespoons fresh rosemary, coarsely chopped
4 cloves garlic, grated
Spread 1 tablespoon oil on bottom and sides of baking pan. Sprinkle bottom and sides of pan with cornmeal; set aside. Pour 1/2 cup milk into the bowl of an electric mixer, and sprinkle yeast on top. Let stand until foamy, about 5 minutes.
Add 3 tablespoons oil, remaining 2 cups milk, flour, salt, and 2 tablespoons rosemary. Using paddle attachment, mix on medium speed until dough comes together. Change attachment to dough hook, and mix on medium high speed until dough is smooth and slightly sticky to the touch, 5 to 6 minutes : if necessary add more flour, 1 tablespoon at a time. Turn out dough onto a clean surface, and knead it into a ball.
Lightly brush a large bowl with oil. Transfer dough to bowl, and cover with plastic wrap. Set aside in a warm place until dough has doubled in size, 45 to 60 minutes.
Preheat over to 425∞F. Punch down dough, and fold back onto itself; turn over. Re-cover with plastic wrap, and let rise until doubled in size, about 30 minutes.
Turn out dough onto prepared baking pan, and let sit 5 minutes. Stretch dough out to fully fit pan. Cover with lightly oiled plastic wrap, and set aside to rise in a warm place, 30 minutes.
Remove plastic wrap. Using your fingertips, make indentations all over the surface of the dough. Combine remaining 2 tablespoons of olive oil with garlic and brush evenly over the surface of the dough. Sprinkle with salt and remaining 1 tablespoon rosemary.
Bake until golden brown, rotating pan once, about 20 minutes total. Remove from the oven, and place on a wire rack, 5 to 7 minutes. Run a knife around the edges of the pan and invert focaccia onto rack. Turn focaccia right-side up; serve warm or at room temperature.
On The Shelf
On The Shelf
Here you will find the books I currently have on my bookshelf along with a brief description of each book. Some of them are no longer in print but you can always find used copies over eBay. 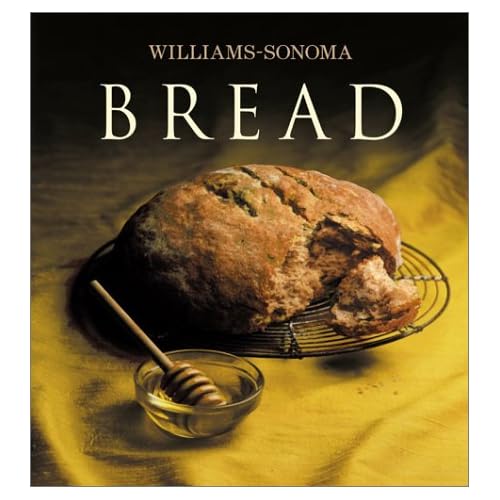 Bread-Williams Sonoma
Hardcover: 120 pages
Publisher: Free Press (November 5, 2002)
Language: English
A warm slice of bread, fresh from the oven and spread with butter, is one of life's simple pleasures. Whether it's a traditional whole-wheat loaf, a crusty baguette, or tender blueberry muffins, the delicious taste and aroma of home-baked bread appeals to all of our senses. Best of all, delectable baked goods will delight friends and family alike.
Williams-Sonoma Collection Bread offers more than 40 delicious recipes, from traditional yeast breads to convenient quick breads, including breakfast treats such as muffins and scones. Whether you are in search of a savory sourdough loaf to serve with soup, simple dinner rolls to enhance the holiday table, or classic banana bread for an afternoon snack, this book includes recipes for every occasion. In addition, a final chapter on international breads, such as Italian focaccia or French brioche, rounds out this essential collection for the home baker.
Enticing photographs of each recipe make it easy to choose which bread to bake, and photographic side notes give insight into each recipe. Including all the techniques essential to mastering the art of making bread -- from mixing and kneading to rising and baking -- here is everything you need to bake the perfect loaf.
 Cake-Williams Sonoma
Hardcover: 120 pages
Publisher: Free Press (November 4, 2003)
Language: English
A slice of rich, moist cake is irresistible. From a tart, sweet lemon sponge or airy angel food cake to a decadent chocolate torte, there is a cake to satisfy every craving. Whether you are searching for a special cake to establish a birthday tradition or are simply looking for a sweet ending to an everyday meal, there are cakes to fit any occasion.
Williams-Sonoma Collection Cake offers more than 35 tantalizing recipes, including updated classics as well as fresh new ideas. For elegant entertaining, make an impressive Rolled Chestnut Cream Cake before your guests arrive, then relax and enjoy the party. When time is short, keep it simple with easy Chocolate-Orange Cupcakes or Espresso Pound Cake. The many delicious recipes inside these pages will inspire you to tempt and dazzle friends and family alike. A chapter devoted to decorating ideas will help you transform any cake into a work of art.
Full-color photographs of each recipe help you easily decide which cake you want to prepare, and photographic side notes throughout the book highlight key techniques and ingredients. In addition, an informative basics section, with tips for both beginning and experienced bakers, makes this book the ideal source to have on hand for creating the perfect cake.
 Christmas with Martha Stewart Living
Paperback: 144 pages
Publisher: Clarkson Potter; 1st ed edition (September 2, 1997)
Language: English
Martha Stewart's fans look to her to provide a sense of what's possible with unlimited taste and plenty of decorating funds, and certainly no one else does Christmas with such flair. Martha's Christmas feast may seem a bit over the top, with silver-leaved fruit at each place setting, crystal decanters of French dessert wines, and cake stands holding more decorations, but it photographs nicely--and, of course, the food looks great. There's also an easier New Year's Day party suggestion that will appeal to more casual party-givers. Martha's signature is the elegant simplicity of her decorative concepts, and this book's strength is its easy instructions for making wonderful wreaths, tree ornaments, and gift wrappings. The instructions for making aluminum snowflakes may alone be worth the price of the book.
 Desserts-Best of Martha Stewart Living
Paperback: 144 pages
Publisher: Clarkson Potter (November 17, 1998)
Language: English
From wonderful classic cakes to inspiring confections of seasonal fruit, these homemade desserts make the most delicious impressions at every occasion--a birthday or wedding, an elegant holiday dinner or casual summer luncheon, a country picnic or everyday meal. Easy-to-follow recipes guide you each step of the way, and color photographs of all the desserts offer beautiful, creative serving ideas.
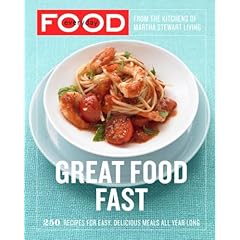 Everyday Food-Great Food Fast
Paperback: 384 pages
Publisher: Clarkson Potter (March 13, 2007)
Language: English
No matter how busy you are, at the end of the day you want fresh, flavorful meals that are easy to prepare. And you want lots of choices and variations—recipes that call for your favorite foods and take advantage of excellent (and readily available) ingredients. In the first book from the award-winning magazine Everyday Food, you’ll find all of that: 250 simple recipes for delicious meals that are quick enough to make any day of the week.
Because a change in weather affects how we cook as much as what we cook, the recipes in Everyday Food are arranged by season. For spring, you’ll find speedy preparations for main-course salads, chicken, and poached salmon that minimize time spent at the stove; summer features quick techniques for grilling the very best burgers and kabobs as well as no-cook pasta sauces; for fall, there are braised meats and hearty main-course soups; and winter provides new takes on rich one-dish meals, roasts and stews, and hearty baked pastas. Finally, a chapter on basics explains how to make year-round staples such as foolproof roast chicken, risotto, couscous, and chocolate sauce.
Designed in a contemporary and easy-to-read format, Everyday Food boasts lush, full-color photography and plenty of suggestions for substitutions and variations. With Everyday Food, even the busiest on-the-go cook can look forward to meals that bring freshness, nutrition, and a range of flavors to dinner all week long.
 Favorite Comfort Food-Classic Favorites and Great New Recipies
Paperback: 144 pages
Publisher: Clarkson Potter; 1st edition (November 16, 1999)
Language: English
Ever have one of those days when you just feel like putting your feet up, propping a pillow behind your head and tucking into a slice of apple pie? Martha Stewart's latest recipe book is perfect for all those rainy days, and is full of such cozy favourites as brownies, tuna melts, chicken potpie and macaroni and cheese. Treat yourself to a day in bed with Favorite Comfort Food. It's a good thing!
 Great American Wreaths
Paperback: 144 pages
Publisher: Clarkson Potter (November 5, 1996)
Language: English
Both a how-to craft book and a decorating guide, Wreaths offers 51 projects for delightful wreaths--complete with step-by-step instructions--honoring the 50 states and the District of Columbia. Designed for use throughout the year, these wreaths are made from materials inspired by their locations: i.e. an oak leaf and acorn wreath as a homage to the nation's capital; cranberries for Massachusetts; and golden wheat to symbolize Oklahoma. Full color.
 Ice Cream-Williams Sonoma
Hardcover: 120 pages
Publisher: Free Press (May 6, 2003)
Language: English
Vanilla, strawberry, chocolate, coffee: Everyone has a favorite flavor of ice cream. As a simple treat on a hot summer afternoon or an elegant finish to a special meal, ice cream is a versatile dessert that is delightfully easy to make at home.
Williams-Sonoma Collection Ice Cream offers more than 40 recipes for rich ice creams, tangy sorbets, and flavorful granitas. When delicious combinations of ingredients -- fresh cream, fruit at its peak of ripeness, fine-quality chocolate -- are combined and frozen in an ice-cream maker, the results are always sublime. From the crunch of ice creams made with candy, cookies, or nuts to those as smooth as caramel, there are plenty of irresistible choices inside these pages. In addition, an entire chapter devoted to more elaborate ice cream dishes will inspire you to use your favorite flavors to make impressive frozen desserts.
Tempting, full-color photographs of each ice cream make it easy to decide which one to prepare, and photographic side notes highlight essential ingredients and techniques, making Ice Cream more than just a fine collection of recipes. A comprehensive basics section and a detailed glossary will also provide you with everything you need to know to make delicious homemade ice cream your new favorite dessert.
From a scoop of creamy, old-fashioned ice cream to a dish of sweet sorbet or a spoonful of rich gelato -- iced desserts are a refreshing way to enjoy an infinite array of wonderful, sweet flavors.
Williams-Sonoma Collection Ice Cream offers more than 40 easy-to-follow recipes that allow you to make all-time favorites as well as delicious new flavors. Whether you crave an irresistibly rich chocolate-hazelnut gelato, a light and tangy lemon sorbet, or the best vanilla ice cream you have ever tasted, the recipes inside will inspire you to serve ice cream for any occasion. This vividly photographed, full-color recipe collection promises to become an essential addition to your kitchen bookshelf.
"Once you have sampled the flavors inside, you will realize that homemade ice cream is simply the best there is!"
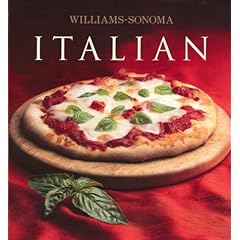 Italian-Williams Sonoma
Hardcover: 120 pages
Publisher: Free Press (April 27, 2004)
Language: English
From a hearty frittata with sweet peppers and sausage to tender gnocchi served with a sublime sauce of four cheeses and grilled balsamic-glazed veal chops on a bed of polenta, the sumptuous yet easy-to-make recipes in this book represent the very best of vibrant Italian cuisine.
Williams-Sonoma Collection Italian offers more than 40 recipes, including beloved favorites as well as exciting new ideas. Pastas such as ravioli filled with butternut squash or papparadelle sauced with long-simmered meat ragu make satisfying meals in themselves. When hosting an elegant dinner party, serve individual spinach timbales followed by roast sea bass with fennel and lemon. For a sweet finish, choose from crunchy almond biscotti, irresistible tiramisù, or creamy panna cotta. With an entire chapter devoted to each traditional Italian course, this volume offers plenty of inspiring recipes perfect for any occasion.
Full-color photographs of each dish help you decide which one to prepare, and each recipe is accompanied by a photographic side note that highlights a key ingredient or technique. With an informative basics section on Italian cooking, including an extensive glossary, you will quickly learn all you need to know to make delicious Italian meals to share with family and friends.
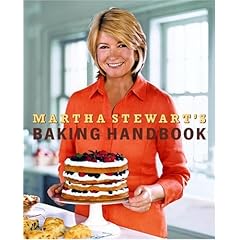 Martha Stewart's Baking Handbook
Hardcover: 416 pages
Publisher: Clarkson Potter (November 1, 2005)
Language: English
Six years after Stewart's now classic Hors D'Oeuvres Handbook reinvented canapés, here is an end-of-the-meal sequel. General baking tips start things off, most of which are beginner focused ("Read a recipe all the way through"), along with an illustrated guide to baking equipment. Along with expertise, Stewart is also selling the fantasy of wealth; she keeps a vast collection of pots, pans and implements in her own pantry. At times, readers may wish she would offer more suggestions of substitutions for these tools and gadgets (for instance, nearly all the recipes require a stand-up mixer). All the same, this work is, as promised, an essential guide. The recipes include 42 different cookies and 30 cakes, plus pies, tarts, coffee cakes, scones, biscuits, muffins, crackers, bread, fine pastries and more. They range from Classic Apple Pie to twists on standards, like a Tarte Tatin that involves cooking the apples entirely in the oven (instead of on the stovetop) and international goodies like Torta della Nonna. Instructions and sidebars are exhaustive yet accessible. Naturally, the book is exquisitely designed, with beautiful food styling and the spare, closeup photography that's become a hallmark of Stewart publications. Additionally, Stewart includes instructions for decorative crusts, coconut shavings and pastry twists that make her creations look so appealing.
 Martha Stewart's Healthy Quick Cook
Hardcover: 224 pages
Publisher: Amazon Remainders Account; 1st edition (October 28, 1997)
Our favorite Doyenne of the Dainty serves a delicate and oh-so-tasty blend of low-fat elegance in this handsomely designed cookbook. No calorie counter, Martha proves how a lush variety of grains, fruits, and veggies can be a delicious alternative to fatty dishes. She offers more than 170 recipes, showing how to transform the freshest seasonal ingredients into scrumptious treats guaranteed to delight both the palate and the eye. From Grilled Portobello Pizza to a luscious Lime Soufflé, Martha will change the way you think about healthy eating.
 Martha Stewart's Hors d'Oeuvres Handbook
Hardcover: 496 pages
Publisher: Clarkson Potter; 1 edition (March 30, 1999
Language: English
With Martha Stewart's Hors d'Oeuvres Handbook, Stewart, along with Martha Stewart Living food editor Susan Spungen and photographer Dana Gallagher, has created not just a handbook but a dream book. The first 225 pages consist entirely of beautifully photographed, exquisite nibbles, tastes, and bites--and the following 270 pages give you the recipes and instructions to re-create them at home. Pink and orange ribbons bound into the book allow you to easily mark photos and recipes. Only Martha and her staff would come up with something so beautiful and practical.
You can browse the photos for inspiration, or dive right into one of the chapters, all organized by presentation, such as "Layered and Stacked"; "Wrapped, Rolled, Filled, Folded and Stuffed"; "Skewered and Threaded"; "Bites and Pieces"; and "Sips and Drinks," just to name a few. Having a few friends over for cocktails before the show? How about Crispy Asparagus Straws, a delicious combo of asparagus wrapped in prosciutto and phyllo and sprinkled with Parmesan? The sophisticated flavors belie the ease of preparation. Have a little more time to prepare? The Jicama and Green Papaya Summer Rolls with Peanut Dipping Sauce are tasty and beautiful.
As gorgeous as this cookbook is, don't dismiss it as coffee-table cooking--several helpful photos show technique as well as finished product, and Martha's tips and notes are sprinkled throughout the text. For example, a lengthy sidebar on purchasing and preparing shrimp shares how to buy shrimp (the high quality of flash-frozen shrimp these days makes it perfectly acceptable), how to cook it (use kosher salt in your cooking water), and how best to peel and devein the little treasures. Similarly, reading the note on preparing phyllo will encourage even a novice cook to try her hand at Phyllo Triangles with Feta and Spinach or Curried Walnut Chicken. If you're planning a party and need fabulous finger food, you needn't look any further than Martha Stewart's Hors d'Oeuvres Handbook. Martha Stewart's Menus for Entertaining
Paperback: 224 pages
Publisher: Clarkson Potter (October 15, 2002)
Language: English
Once again, Martha Stewart amazes-and perhaps intimidates-with her picture-perfect collection of menus for entertaining. This volume reveals a "simplified approach," Stewart says. Of course, this comes from a woman who, as a working mother two decades ago, made "pound after pound of sweet butter pate feuilletee, and pressed by hand virtually hundreds of tiny tart shells." Her North Carolina Barbecue, which features Kitty Murphy's Brunswick Stew, a hearty chicken dish, and Roquefort Potato Salad ("I always buy the real French variety," Stewart reveals) stars the daintiest pulled pork imaginable, looking as precious as watercress when piled on soft buns. (Home cooks should not be disappointed when their pork turns out looking a bit less delicate.) The Best Clambake, handsomely photographed on a beach in East Hampton, requires hickory logs and galvanized tubs; Martha also drags to the beach a special grill that "was made especially for me by an Argentinian polo player." But for all the labor-intensive Martha-ness about this volume, the menus she describes are both delicious and inspiring. The events featured are high concept (pasta made to order-for 20 guests), but the dishes themselves are relatively uncomplicated. So while it's unlikely that most cooks will want to organize the entire Surprisingly Simple Chinese feast, with its two whole fishes and 14 accompanying dishes, if they take a recipe here and a recipe there from Martha's varied and easy-to-follow collection, they'll create a meal sure to impress almost anyone-perhaps even Martha herself.
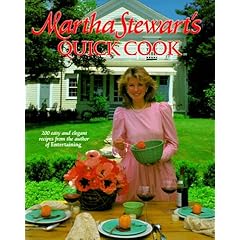 Martha Stewart's Quick Cook Menus
Hardcover: 224 pages
Publisher: Clarkson Potter; 1st edition (Dec 13 1983)
Language: English
 Martha Stewart's Quick Cook Menus
Hardcover
Publisher: Clarkson Potter (November 2, 1988)
 Mexican-Williams Sonoma
Hardcover: 120 pages
Publisher: Free Press (April 27, 2004)
Language: English
Mexico's rich and diverse culinary traditions include countless complex and vibrant dishes. In these pages, you will find recipes that capture the best of the cuisine, from mole poblano, a long-simmered blend of chiles, seeds, and spices, to bright-flavored ceviche dressed with fresh citrus juice. A chapter on desserts also tempts, whether you crave chocolate cake with chile-infused whipped cream or coffee and KahlÚa flan.
Williams-Sonoma Collection Mexican offers more than 40 recipes, including well-loved classics and many other timeless dishes. For a casual dinner, fill warm corn tortillas with tender morsels of carnitas or chunks of fresh fish lightly fried to a crisp golden brown. Or, plan a summer supper of watercress salad tossed with orange, jicama, and avocado; creamy corn and poblano chile soup; and delicate sea bass topped with salsa verde. Versatile and delicious, Mexican food is always irresistible.
Full-color photographs of each dish help you decide which one to prepare, and each recipe is accompanied by a photographic side note that highlights a key ingredient or technique, making Mexican more than just a superb collection of recipes. Including all the basics and an extensive glossary, this essential volume will help you create and enjoy many delicious Mexican meals.
 Parties and Projects for the Holidays
Paperback: 144 pages
Publisher: Clarkson Potter (September 12, 2000)
Language: English
The fourth book in the popular "Christmas with Martha Stewart Living" series, Parties and Projects for the Holidays helps holiday hosts impart the warmth and good cheer of the season to all their holiday entertaining and decorating.
 The Martha Stewart Cookbook-Recipes for Every Day
Hardcover: 640 pages
Publisher: Clarkson Potter; 1 edition (October 10, 1995)
Language: English
Stewart assembles her previous nine collections in one volume. New material is included in sidebars ("I have been making pastry crusts since I was a little girl") and some recipe headings ("Guests cannot believe that someone has actually stuffed a snow pea!"). Abundant among the more than 1600 recipes is the sort of labor-intensive company fare that Stewart is known for, like the nine recipes (plus more suggested variations) in "Hors d'Oeuvres" for seeded and filled cherry tomatoes, or Pumpkin Pot Pies, in which the meat from herb-roasted Cornish hens is combined with vegetables and a Cognac sauce and cooked inside hollowed-out, three-pound pumpkins that are capped with puff pastry crusts. There are, however, simple dishes such as grilled Chicken Paillard and Pencil Asparagus with Lemon; others draw on ethnic and regional cuisines, such as Saffron Couscous and Soba Noodles with Cucumbers. Line drawings illustrate some difficult techniques; "Entertaining a Crowd" offers recipes for pasta parties, tempura fetes and clambakes.
 The Martha Stewart Living Cookbook-The New Classics
Hardcover: 672 pages
Publisher: Clarkson Potter (October 23, 2007)
Language: English
A culinary treasure, The Martha Stewart Living Cookbook—The Original Classics became an indispensable reference when it was first published. Now, years later, comes its companion volume, The Martha Stewart Living Cookbook—The New Classics, which includes an index for both volumes and collects more than 1,200 of the best-of-the-best recipes that have appeared in Martha Stewart Living magazine since 2000.
From the practical to the inspirational, from quiet suppers for two to dinner parties for ten, The Martha Stewart Living Cookbook—The New Classics has options for every meal and every cook, with family-pleasing classics, new fare, and twists on both. Whether you’re looking for an easy weeknight dinner such as Tuna Steaks with Mint Sauce or a sophisticated hors d’oeuvre like Prosciutto Crostini and Fresh Figs with Gorgonzola or a rich dessert like the Ultimate Malted Brownie Sundae, The Martha Stewart Living Cookbook—The New Classics provides excellent choices across 22 categories. In addition to recipes for all-time favorites such as Lasagne Bolognese, Chicken Soup with Dumplings, the Best Onion Rings, and Apple Pie with Cheddar Crust, you will find helpful how-to photographs that demystify preparations for piecrust, gnocchi, soufflés, and more. Here, too, are cooking tips and techniques, nutritional information for healthy choices, comprehensive pantry and equipment glossaries, menu ideas, and a resource guide for finding ingredients.
With the same stunning color photography and easy-to-follow, comprehensive format that grace the pages of Martha Stewart Living and The Martha Stewart Living Cookbook—The Original Classics, this new volume is a must-have reference that will become a loved and oft-used favorite of every home cook.
 The Martha Stewart Living Cookbook-The Original Classics
Hardcover: 640 pages
Publisher: Clarkson Potter;(September 4, 2007)
Language: English
There are certain tools no home cook should be without: a well-sharpened chef’s knife, sturdy mixing bowls, and The Martha Stewart Living Cookbook–The Original Classics. This indispensable reference book gathers more than 1,100 recipes published in Martha Stewart Living from its inception in 1990 to 2000–a decade’s worth of the best of the best from every issue. Now, well into the magazine’s second decade, the editors of Martha’s flagship magazine have revisited this landmark cookbook, adding new content such as suggested menus, an updated pantry and equipment section, a revised source list, how-to photos, and nutritional information to reflect the way we cook today.
From basics to breakfast, from poultry to pastry, The Martha Stewart Living Cookbook–The Original Classics is filled with recipes for every cook and every occasion. Whether it’s a special dinner party, a sit-down luncheon for a bride-to-be, or a casual weeknight supper, this updated collection offers wonderful options across 22 categories, including Starters, Meat, Poultry, Fish and Shellfish, Salads, Soups, Meatless Main Dishes, and Desserts. Throughout, there are essential classes (cooking 101s) for dishes that should be in every cook’s repertoire: roast turkey, whole poached salmon, glazed ham, prime rib roast, macaroni and cheese, fried chicken, and mashed potatoes, as well as recipes that invite you to stretch your cooking knowledge and expertise.
Helpful tips and techniques, comprehensive equipment glossaries, plus a guide to finding unusual ingredients make the kitchen-tested recipes accessible to home cooks everywhere. The Martha Stewart Living Cookbook–The Original Classics belongs on every kitchen counter in America.
 William Sonoma Barcelona-Authentic Recipes Celebrating the Foods of the World
Hardcover: 191 pages
Publisher: Oxmoor House (October 15, 2004)
Language: English
An insider’s guide to the recipes, ingredients, and traditions that define international city cuisine, the Foods of the World series is the definitive cookbook collection for anyone passionate about food and travel. Richly photographed, with over 45 authentic recipes and in-depth culinary features, each book brings readers closer to the best eating experiences each city has to offer from a culinary authority Americans trust.
Barcelona is a city known for its innovative and dynamic culinary scene. From Tomato-Rubbed Bread to Fideuà to Crema Catalana—each brings the taste of Barcelona to your table.
Key Features:
Recreate the rich heritage of Catalonian cuisine at home with Grilled Green Onions with Romesco Sauce or Stone-Cooked Lamb Chops with Herb Oil
Learn how the geographical location of Barcelona, between the Pyrenees mountains and the Mediterranean, has shaped the way the city eats, with favorites such as cured meats, olive oil, artisanal cheeses, wine, fresh seafood, and seasonal produce
Uncover some of Europe’s most traditional and contemporary dining experiences among Barcelona’s marvelous diversity of restaurants